# Solr Installation and make it as Window service
#### Check Solr Status
```
E:\Solr\solr-8.8.2>bin\solr.cmd status
```
#### Start Solr
```
E:\Solr\solr-8.8.2>bin\solr.cmd start
```
#### Import Data From CSV
```
E:\Solr\solr-8.8.2>java -jar -Dc=barcode -Dauto example\exampledocs\post.jar example\exampledocs\product1.csv
```
> \*\*\*\*\*\*\*\*\*\*\*\*\*\*\*\*\*\*\*\*\*\*\*\*IMP Links\*\*\*\*\*\*\*\*\*\*\*\*\*\*\*\*\*\*\*\*\*
> https://solr.apache.org/guide/6\_6/post-tool.html
>
> https://www.progress.com/tutorials/jdbc/import-sql-server-data-into-apache-solr-using-data-import-handler-via-jdbc#:~:text=Importing%20the%20Data,-Start%20Apache%20Solr&text=Go%20to%20browser%20and%20open,a%20view%20as%20shown%20below.
>
> https://www.cdata.com/kb/tech/mysql-jdbc-apache-solr.rst
>
> [http://localhost:8983/solr/demo/select?facet=true&f.price.facet.range.start=0&f.price.facet.range.end=10&f.price.facet.range.gap=1&facet.range=price&q=\*:\*](http://localhost:8983/solr/demo/select?facet=true&f.price.facet.range.start=0&f.price.facet.range.end=10&f.price.facet.range.gap=1&facet.range=price&q=*:*)
## Install Solr as service in Windows
I took the article from following link all credit goes to author of this article, I have personally tried to run this on window server 2019 and we achieved what we want in no time.
[https://norconex.com/how-to-run-solr5-as-a-service-on-windows/](https://norconex.com/how-to-run-solr5-as-a-service-on-windows/)
[https://nssm.cc/download](https://nssm.cc/download)
### File System Setup
Taking Solr 8 as an example, first, extract Solr and NSSM to the following path on your file system (adapt paths as necessary).
```
C:\Program Files\solr-5.0.0
C:\Program Files\nssm
```
Setting up Solr as a service
On the command line, type the following:
```
"c:\Program Files\nssm\win64\nssm" install solr
```
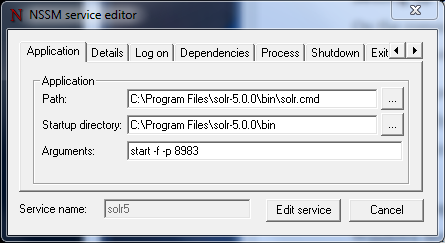
Fill out the path to the **solr.cmd** script, and the startup directory should be filled in automatically. Don’t forget to input the **-f (foreground)** parameter so that NSSM can kill it when it needs to be stopped or restarted.
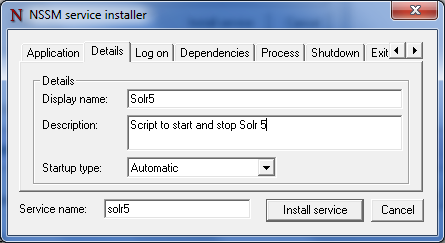
The following step is optional, but I prefer having a clean and descriptive name in my Windows Service Manager. Under the details tab, fill out the Display name and Description.
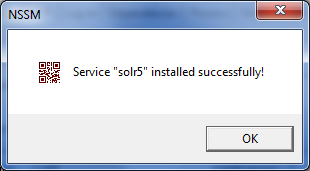
Click on Install service.
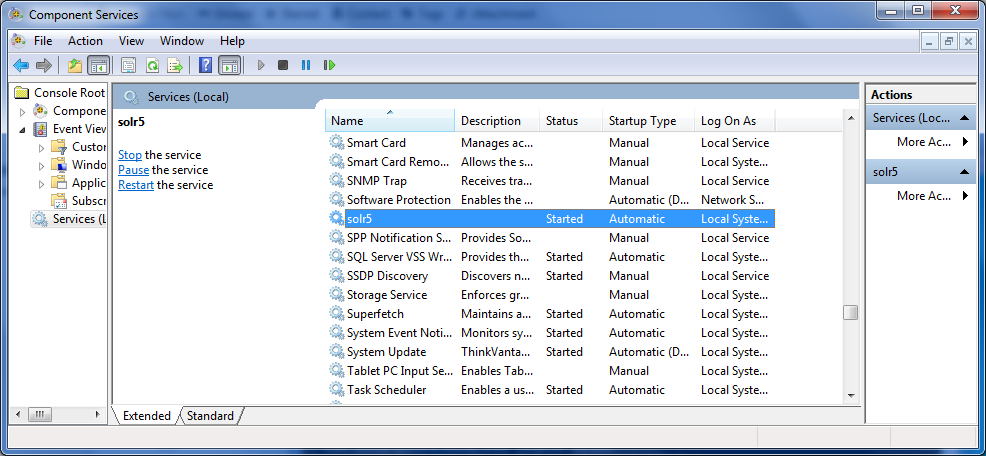
Check that the service is running.
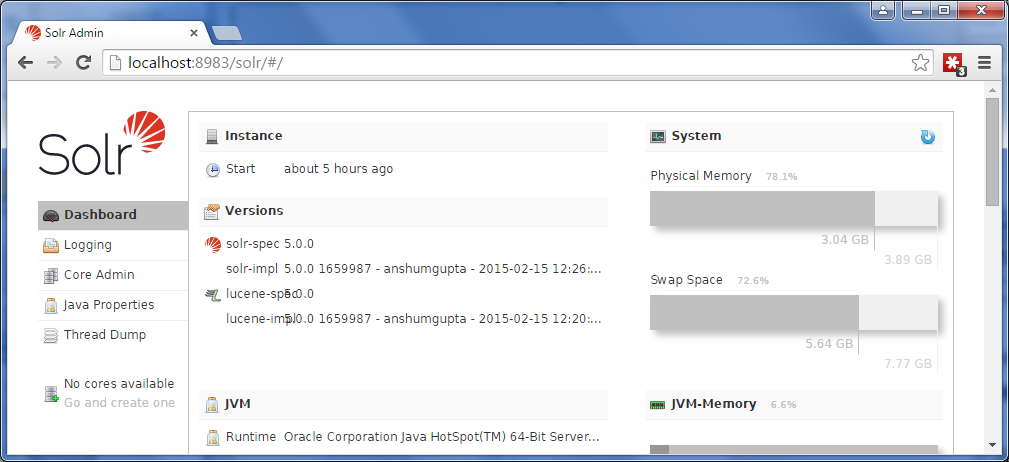
Go to your favorite web browser and make sure Solr is up and running.
### Conclusion
I spent a few hours finding this simple solution, and I hope this tutorial will help you set up Solr as a Microsoft Windows service in no time. I invite you to view the solr.cmd file content to find the parameters that will help you customize your Solr setup. For instance, while looking inside this file, I realized there I needed to add the -f parameter to run Solr in the foreground. That was key to get it running the way I needed it.